November 24, 2023

React Bootstrap Login Form With Validations

In this post we'll see how to create a login form with validations using React and Bootstrap 5. The login form has two fields- email and password and a submit button.

login form react

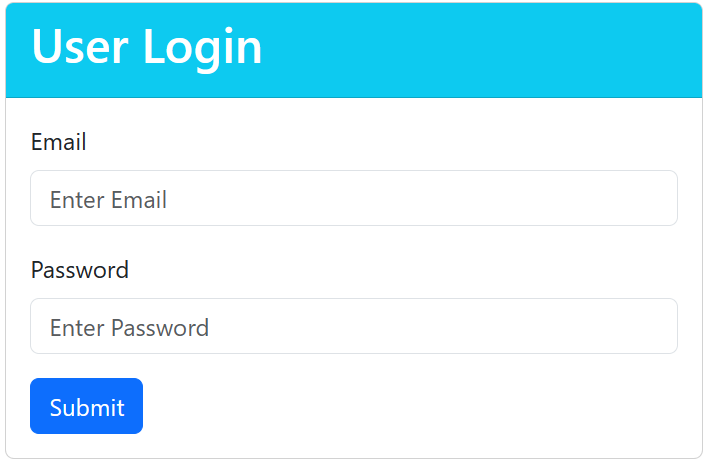
LoginForm React and Bootstrap Example

In this example Bootstrap 5 is used.

If you want to know how to download Bootstrap and use in your React application, check this post- Installing Bootstrap in React

Login.js

import { useState } from "react";

const Login = () => {
    const [formField, setState] = useState({
        email: '',
        passwd: '',
        errors: []
    });
    const handleInputChange = (event) => {
        let errors = [];
        // clear errors if any
        if (formField.errors.length > 0) {
            setState((prevState) => (
                {...prevState, errors}
            ));
        }
        const value = event.target.value;
        const name = event.target.name;
        setState((prevState) => (
            {...prevState, [name]: value}
        ));
    }
    const submitHandler = (event) => {
        event.preventDefault();
        let errors = [];
        //email regular expression pattern
        const emailRegEx = /^\w+([.-]?\w+)*@\w+([.-]?\w+)*(\.\w{2,3})+$/;
        let isEmailValid = emailRegEx.test(formField.email.toLowerCase())
        
        if (!isEmailValid) {
            errors.push("email");
        }
        if(formField.passwd  === ""){
            errors.push("passwd");
        }

        setState((prevState) => (
            {...prevState, errors}
        ));
        // If there is error dont submit, return to form
        if (errors.length > 0) {
            return false;
        } else{
            // write code for successful submission...
            console.log('Form Submitted')
        }
    }

    const hasError = (name) => {
        //console.log("haserror " + name);
        return formField.errors.indexOf(name) !== -1;
    }

    return (
        <div className="card col-5 mt-5 mx-auto">
            <div className="card-header bg-info text-white">
            <h2>User Login</h2>
            </div>
            <div className="card-body">
                <form onSubmit={submitHandler}>
                    <div className="mb-3">
                        <label className="form-label" htmlFor="userEmail">Email</label>
                        <input type="text" 
                            className={hasError("email") ? "form-control is-invalid" :"form-control"}  
                            placeholder="Enter Email" 
                            name="email"
                            id="userEmail" 
                            value={formField.email} 
                            onChange={handleInputChange} />
                         <div className={hasError("email") ? "invalid-feedback" : ""}>
                            { hasError("email") ? <span>Please enter valid email</span> : "" }
                         </div>
                    </div>   
                    <div className="mb-3">
                        <label className="form-label" htmlFor="userPassword">Password</label>
                        <input type="password" 
                            className={hasError("passwd") ? "form-control is-invalid" :"form-control"}   
                            placeholder="Enter Password" 
                            name="passwd"
                            id="userPassword" 
                            value={formField.passwd} 
                            onChange={handleInputChange}/>
                        <div className={hasError("passwd") ? "invalid-feedback" : ""}>
                            { hasError("passwd") ? <span>Please enter password</span> : "" }
                         </div>
                    </div>  
                    <button type="submit" className="btn btn-primary">Submit</button> 
                </form>
            </div>
        </div>
    )
    
}

export default Login;

Some important points about the login form are as given below-

  1. Uses the Bootstrap card as a container for the form elements.
  2. Single state is used here with useState() hook. State is managed as an object with three properties email, passwd and an array of errors which keeps track of all the fields that fail validations. Initial state is empty string for email and passwd, empty array ([]) for errors.
  3. In input fields onChange() event handler is mapped to a single function handleInputChange() for all the fields. Note that a single setState() changes state for all the form fields. For that to work, ensure that the name you give to input fields matches the name of the properties in state object.
  4. When calling setState() to update state, spread operator is used to spread the previous state so that you can overwrite the individual fields without losing the data for other fields.
    setState((prevState) => (
        {...prevState, [name]: value}
    ));
    	
  5. Form onSubmit() event handler is mapped to submitHandler() function. That's where field validation is done and field name is pushed to errors array if field fails validation.
  6. While rendering, errors array is checked. If field exists in that array that means field failed validation.
  7. When the field fails validation Bootstrap class "is-invalid" is added which creates red border around the field. For error message "invalid-feedback" class is used. You don't need to write any css yourself.

Clicking submit without entering any values.

login form React Bootstrap

When only email is entered.

That's all for the topic React Bootstrap Login Form With Validations. If something is missing or you have something to share about the topic please write a comment.


You may also like

November 20, 2023

Nested Route in React

In the post Dynamic Route in React we have seen how you can add dynamic segments to the routes. In that kind of parent and child route scenario you can also use nested routes to create a component hierarchy and UI also looks better as you can display both parent and child components next to each other by using <Outlet /> in the parent component to render the child route's element.

Nested route in React

Nested routes or child routes in React gives you an option to place a route relative to another route which is not root route.

If you have followed example in this post React Router - Link in react-router-dom this has already been done so that the route, that points to Navigation, acts as a parent component and the other routes as nested routes.

How to create a child route in React

You place child routes in a children array within the parent route. For example, in the given route definition root route ("/") acts as a parent route for all the routes that's why all the other routes are defined as children.

Then we have a "/users" route and a dynamic route "/users/:userId", that is also done as a nested route so that the route with dynamic segment becomes a child route. That way as path we just need to give the child path segment (":userId") as it is relative to its parent.

export const router = createBrowserRouter([
    {path: "/", element: <Navigation />, errorElement: <ErrorPage />,
     children: [
        {index: true, element: <Home /> },
        {path: "users", element: <Users />,
            children: [
                {path: ":userId", element: <UserDetails/>}
            ]
        },
        {path: "about", element: <About />}
     ]
    },        
])

Note that in this route definiton, route paths are relative paths (does not begin with "/") which means paths resolve relative to the parent route. ":userId" is a child route of "users" so it builds upen the parent route meaning it resolves to "/users/:userId".

Nested Route React example

In the example we display a page with list of user names using Users Component. For the user’s name that is clicked user details are displayed using UserDetails component. Dynamic routing is used here to pass userId as route parameter. It is the same example used in Dynamic Route post but now we’ll place path with dynamic segment as a child route so that there is a component hierarchy between Users and UserDetails and we can show UserDetails data next to Users data by placing <Outlet /> in the Users (parent) component.

Route Definition

src\components\Routes\route.js

import { createBrowserRouter } from "react-router-dom";
import About from "./About";
import ErrorPage from "./ErrorPage";
import Home from "./Home";
import Navigation from "./Navigation";
import UserDetails from "./UserDetails";
import Users from "./Users";

export const router = createBrowserRouter([
    {path: "/", element: <Navigation />, errorElement: <ErrorPage />,
     children: [
        {index: true, element: <Home /> },
        {path: "users", element: <Users />,
            children: [
                {path: ":userId", element: <UserDetails/>}
            ]
        },
        {path: "about", element: <About />}
     ]
    },        
])

Providing the routes

Provide the route definition to your application using the <RouteProvider> component.

import { RouterProvider } from 'react-router-dom';
import { router } from './components/Routes/route';

function App() {
  return <RouterProvider router={router}></RouterProvider>
}

export default App;

Components

Two components that we need for user are Users and UserDetail.

src\components\Routes\Users.js

import { Link, Outlet } from "react-router-dom"

export const DUMMY_USERS = [
    {id: 1, name: "Ram", age: 23},
    {id: 2, name: "Namita", age: 25},
    {id: 3, name: "Varun", age: 32},
    {id: 4, name: "Leo", age: 28},
    {id: 5, name: "Melissa", age: 27},
]

const Users = () => {
    return(
        <>
            <div className= "row">
                <div className="col-sm-4">
                    <h2>Users</h2>
                    <ul className="list-group">

                        {DUMMY_USERS.map(user =><li className="list-group-item" key={user.id}> 
                            <Link to={user.id.toString()}>{user.name}</Link></li>
                        )}
                    </ul>
                </div>
                <div className="col-sm-4">
                    <Outlet />
                </div>
            </div>
            </>
   
    )
}

export default Users;

Some points to note here are-

  1. Bootstrap5 is used here for styling.
  2. In the code a hardcoded array holding user objects is created named DUMMY_USERS.
  3. Note how links are created for each user name while looping the user array
    <Link to={user.id.toString()}>{user.name}</Link>
    

    In each iteration of the array, id is added as the link. <Link> by default takes the path relative to route and the current route is “/users” which becomes “/users/CURRENT_ID” when the link is clicked. This path is matched by the route “/users/:userId”.

  4. Note the use of <Outlet /> in Users component to render the child route’s element.
    <div className="col-sm-4">
      <Outlet />
    </div>
    

src\components\Routes\UserDetails.js

import { useParams } from "react-router-dom"
import { DUMMY_USERS } from "./Users"

const UserDetails = () => {
    
    const params = useParams();
    // Find the passed ID in the DUMMY_USERS array
    // converting params.userId to number 
    const user = DUMMY_USERS.find(user => user.id === +params.userId)
    return (
        <>
            <h2>User Details</h2>
            <div className="row">
                <div className="col-xs-6">
                    <span>User Name: </span>{user.name}
                </div>
            </div>
            <div className="row">
                <div className="col-xs-6">
                    <span>Age: </span>{user.age}
                </div>

            </div>
        </>
    )
}

export default UserDetails;

Some points to note here are-

  1. useParams() hook is used here to get the value of the dynamic segment.
  2. User whose details are to be displayed is then searched in the array using the passed id.

Please refer this post- Setting Error Page (404 Page) in React Router to get code of other components like Navigation, ErrorPage, Home, About.

When you click on Users menu

When you click on the user name, it should show the corresponding user details next to it.

child route in react

That's all for the topic Nested Route in React. If something is missing or you have something to share about the topic please write a comment.


You may also like

November 17, 2023

Dynamic Route in React

In this post we'll learn about dynamic routes in React which includes how to set route parameters and how to fetch the route parameters.

Why dynamic routing in React

It's a very common requirement in web applications to add a route parameter to the URL based on user input or based on some events. For example, you display list of user names and you show the details of the user whose name is clicked and for that you want to pass userId as a route parameter by appending it to the path- /users/1 or /users/2 and so on based on the clicked user.

It is practically impossible to create static routes by having hard coded values in above mentioned scenario as the number of user records may vary. In such scenarios you will create dynamic routes by having a dynamic segment in your route path that acts as a placeholder for the actual value passed.

How to create dynamic route using react-router

To create a dynamic route that has a route parameter, specify the dynamic segment by prefixing it with a colon. So, the route definition will be in the following form

/route/:routeparam

For example, if you want to create a dynamic path by adding userID of the selected user then such a dynamic route can be defined as-

{path: "/users/:userId", element: <UserDetails/>}

If there is a path segment starting with ":" then it becomes a dynamic segment. In our example ":/userId" is the dynamic segment and it can match any value for this specific segment. Any URL like /users/1, /users/2, users/100 will be matched by this path pattern ("/users/:userId") and use the component UserDetails.

You can also have multiple dynamic segments in one route path- /route/:param1/:param2/:param3

How to retrieve route parameters

When a dynamic route matches the URL, the dynamic segment will be parsed from the URL and provided as params. There is a useParams() hook in react-router-dom that can be used to get values of dynamic segments in route path. The useParams() hook returns an object of key/value pairs of the route parameters from the current URL that were matched by the <Route path>.

For example if /users/100 matches the route path /users/:userId then useParams() hook will return an object as {userId:100}

You can get the whole object initially

const params = useParams();

And then get the specific route parameter when required.

params.userId

Or you can use object destructuring to get the userId param from the URL

let { userId } = useParams();

Dynamic routing ReactJS example

In the example we display a page with list of user names using Users Component. For the user's name that is clicked user details are displayed using UserDetails component. Dynamic routing is used here to pass userId as route parameter.

Route Definition

src\components\Routes\route.js

import { createBrowserRouter } from "react-router-dom";
import About from "./About";
import ErrorPage from "./ErrorPage";
import Home from "./Home";
import Navigation from "./Navigation";
import UserDetails from "./UserDetails";
import Users from "./Users";

export const router = createBrowserRouter([
    {path: "/", element: <Navigation />, errorElement: <ErrorPage />,
     children: [
        {index: true, element: <Home /> },
        {path: "/users", element: <Users />},
        {path: "/users/:userId", element: <UserDetails/>},
        {path: "about", element: <About />}
     ]
    },        
])

Notice the path with dynamic segment- {path: "/users/:userId", element: <UserDetails/>}

Providing the routes

Provide the route definition to your application using the <RouteProvider> component.

import { RouterProvider } from 'react-router-dom';
import { router } from './components/Routes/route';

function App() {
  return <RouterProvider router={router}></RouterProvider>
}

export default App;

Navigation Menu

src\components\Routes\Navigation.js

import { NavLink, Outlet } from "react-router-dom"
import "./navigation.css";

const Navigation = () => {
    return(
        <>
            <nav id="menu" className="navbar navbar-expand-lg bg-dark navbar-dark">
                <div className="container-fluid">
                    <button className="navbar-toggler" type="button" data-bs-toggle="collapse" data-bs-target="#navbarNav" aria-controls="navbarNav" aria-expanded="false" aria-label="Toggle navigation">
                        <span className="navbar-toggler-icon"></span>
                    </button>

                    <div className="collapse navbar-collapse" id="navbarNav">
                        <ul className="navbar-nav">
                            <li className="nav-item">
                                <NavLink 
                                    to="/" 
                                    className={({ isActive }) => isActive ? "active" :""} 
                                    end
                                >
                                    Home
                                </NavLink>
                            </li>
                            <li className="nav-item">
                                <NavLink 
                                    to="/users"
                                    className={({ isActive }) => isActive ? "active" :""} 
                                >
                                    Users
                                </NavLink>
                            </li>
                            <li className="nav-item">
                                <NavLink 
                                    to="/about"
                                    className={({ isActive }) => isActive ? "active" :""} 
                                >
                                    About
                                </NavLink>
                            </li>
                        </ul>
                    </div>
                </div>
            </nav>
            <div className="container">
                <div className="row mt-2">
                    <div className="col-xs-12">
                        <Outlet />
                    </div>
                </div>
            </div>
        </>
    );
}

export default Navigation;

src\components\Routes\navigation.css

#menu a:link,
#menu a:visited {
    color: gray;
}
#menu a:hover {
    color: white;
}
#menu a.active {
    color:#ebecf0;
}

#menu a {
    text-decoration: none;
}

#menu ul {
    gap: 1rem;
}

Components

Two components that we need for user are Users and UserDetail.

src\components\Routes\Users.js

import { Link } from "react-router-dom"

export const DUMMY_USERS = [
    {id: 1, name: "Ram", age: 23},
    {id: 2, name: "Namita", age: 25},
    {id: 3, name: "Varun", age: 32},
    {id: 4, name: "Leo", age: 28},
    {id: 5, name: "Melissa", age: 27},
]

const Users = () => {
    return(
        <>
            <div className= "row">
                <div className="col-sm-4">
                    <h2>Users</h2>
                    <ul className="list-group">

                        {DUMMY_USERS.map(user =><li className="list-group-item" key={user.id}> 
                            <Link to={`/users/${user.id.toString()}`}>{user.name}</Link></li>
                        )}
                    </ul>
                </div>
            </div>
            </>
   
    )
}

export default Users;

Some points to note here are-

  • Bootstrap is used here for styling.
  • In the code a hardcoded array holding user objects is created named DUMMY_USERS.
  • Note how links are created for each user name while looping the user array
    <Link to={`/users/${user.id.toString()}`}>{user.name}</Link>
        
    After “/users”, id is appended as another path segment.
  • When user name is clicked, path is matched by the “/users/:userId” route and UserDetails component is used for rendering.

src\components\Routes\UserDetails.js

import { useParams } from "react-router-dom"
import { DUMMY_USERS } from "./Users"

const UserDetails = () => {
    
    const params = useParams();
    // Find the passed ID in the DUMMY_USERS array
    // converting params.userId to number 
    const user = DUMMY_USERS.find(user => user.id === +params.userId)
    return (
        <>
            <h2>User Details</h2>
            <div className="row">
                <div className="col-xs-6">
                    <span>User Name: </span>{user.name}
                </div>
            </div>
            <div className="row">
                <div className="col-xs-6">
                    <span>Age: </span>{user.age}
                </div>

            </div>
        </>
    )
}

export default UserDetails;

Some points to note here are-

  • useParams() hook is used here to get the value of the dynamic segment.
  • User whose details are to be displayed is then searched in the array using the passed id.

Please refer this post- https://www.knpcode.com/2023/10/setting-error-page-react-router.html to get code of other components like ErrorPage, Home. About.

When Users menu is clicked

Dynamic route in React

Clicking on user name takes to the User details page with details displayed for the user name that was clicked

useParams() in React

Nested routes provide a better way to do the same thing. check this post- Nested Route in React

That's all for the topic Dynamic Route in React. If something is missing or you have something to share about the topic please write a comment.


You may also like