February 28, 2021

Can we Override start() Method in Java

In some Java interviews there is a question asked can we override start() method in Java. Since this is something you will hardly need to do, so some people do hesitate that is it actually possible to override start() method of Thread class or not. Also there is a follow up question will your overridden start() method actually execute the thread and call the run() method or not.

Overriding start method in Java

Yes it is possible to override start() method of the Thread class in Java. Though it is hardly required to do that except for some rare scenarios where you do need some logic to be executed before calling the run() method.

From your overridden start() method ensure that you call super.start() method as Thread class’ start() method is a native method and has the logic to communicate with the OS to schedule the thread to run. Failing to call super.start() will mean run() method won’t be called.

Overriding start method example code

public class MyThread extends Thread {
  @Override
  public void start(){
    System.out.println("In overridden start method");
    // calling parent class start method
    super.start();
  }

  @Override
  public void run() {
    System.out.println("In run method " + "Thread Name - " 
        + Thread.currentThread().getName());
  }

  public static void main(String[] args) {
    Thread t1 = new MyThread();
    t1.start();
  }
}
Output
In overridden start method
In run method Thread Name - Thread-0

That's all for the topic Can we Override start() Method in Java. If something is missing or you have something to share about the topic please write a comment.


You may also like

February 27, 2021

Thread Group in Java

All threads belong to one of a thread group in Java. When you create a thread in Java it is put into a thread group specified either by you or to the same group as the thread that created it if no thread group is explicitly specified.

Default thread group

When a Java application is started one thread starts running immediately which is known as main thread in Java and this main thread belongs to a thread group called main. If you create other threads (with in the context of main thread) with out specifying thread group then these thread will also belong to main thread group.

Usage of thread group in Java

Thread groups provide a convenient way to manage multiple threads as a single thread group object. Using that thread group object you can manipulate all the threads belonging to that group as a single unit rather than doing that individually. For example-

Thread.currentThread().getThreadGroup().interrupt();

This will interrupt all the thread belonging to that thread group with a single statement.

ThreadGroup Class in Java

Java provides a class java.lang.ThreadGroup for creating thread groups in Java.

ThreadGroup Class Constructors

ThreadGroup class has two constructors for creating thread groups.

  • public ThreadGroup(String name)- Constructs a new thread group. The parent of this new group is the thread group of the currently running thread.
  • public ThreadGroup(ThreadGroup parent, String name)- Creates a new thread group. The parent of this new group is the specified thread group.
Methods in ThreadGroup Class

Some of the important methods of the ThreadGroup Class are.

  • String getName()- Returns the name of this thread group.
  • ThreadGroup getParent()- Returns the parent of this thread group.
  • boolean isDaemon()- Tests if this thread group is a daemon thread group.
  • void checkAccess()- Determines if the currently running thread has permission to modify this thread group.
  • int activeCount()- Returns an estimate of the number of active threads in this thread group and its subgroups. Recursively iterates over all subgroups in this thread group.
  • int enumerate(Thread[] list)- Copies into the specified array every active thread in this thread group and its subgroups.
  • void interrupt()- Interrupts all threads in this thread group.
  • void list()- Prints information about this thread group to the standard output.

Creating Thread in specific thread group

Thread class in Java provides constructor where you can specify a thread group. Few of those constructors are listed here.

  • public Thread(ThreadGroup group, Runnable target)
  • public Thread(ThreadGroup group, String name)
  • public Thread(ThreadGroup group, Runnable target, String name)

Thread group Java example

public class TGDemo implements Runnable {
  public static void main(String[] args) {
    System.out.println("In main method " + Thread.currentThread().getName() 
        + " Group " + Thread.currentThread().getThreadGroup().getName());
    TGDemo runnableTarget = new TGDemo();
    // Creating two thread groups
    ThreadGroup group1 = new ThreadGroup("Group-1");
    ThreadGroup group2 = new ThreadGroup("Group-2");
    // Creating 4 threads belonging to the created thread groups
    Thread t1 = new Thread(group1, runnableTarget, "T1");
    Thread t2 = new Thread(group1, runnableTarget, "T2");
    Thread t3 = new Thread(group2, runnableTarget, "T3");
    Thread t4 = new Thread(group2, runnableTarget, "T4");
    t1.start();
    t2.start();
    t3.start();
    t4.start();
    group1.list();
    group2.list();
  }

  @Override
  public void run() {
    System.out.println("In run method " + Thread.currentThread().getName() 
        + " Group " + Thread.currentThread().getThreadGroup().getName());
    if(Thread.currentThread().getThreadGroup().getName().equals("Group-1")){
      Thread.currentThread().getThreadGroup().interrupt();
    }
    if (Thread.interrupted()) {
      System.out.println("interrupted " + Thread.currentThread().getName());
    }
  }
}
Output
In main method main Group main
In run method T1 Group Group-1
java.lang.ThreadGroup[name=Group-1,maxpri=10]
In run method T2 Group Group-1
Thread[T1,5,Group-1]
In run method T4 Group Group-2
Thread[T2,5,Group-1]
java.lang.ThreadGroup[name=Group-2,maxpri=10]
Thread[T3,5,Group-2]
interrupted T1
interrupted T2
In run method T3 Group Group-2

As you can see initially when the application starts main thread starts running and it belongs to thread group main.

Then two thread groups "Group-1" and "Group-2" are created. Four thread are also created to of these threads belong to “Group-1” and other two belongs to “Group-2”.

In run() method you can see specific logic is there for threads belonging to "Group-1".

Reference- https://docs.oracle.com/javase/10/docs/api/java/lang/ThreadGroup.html

That's all for the topic Thread Group in Java. If something is missing or you have something to share about the topic please write a comment.


You may also like

February 25, 2021

Thread Priority in Java With Examples

In a multi-threaded environment, the order in which threads will get CPU cycle is decided by the thread scheduler and it uses thread priority to decide that order. Though that doesn’t mean that the low priority threads will never get a chance to run, that is thread priority in Java won’t lead to a deadlock but low priority threads will get fewer CPU cycles. Higher priority thread can also preempt a lower-priority thread.

Java thread priority

Every thread in Java has a priority assigned to it. When you create a thread in Java it inherits the priority of the thread that created it. You can change thread’s priority at any time after its creation using the setPriority() method of the Thread class. If you want to check the thread’s priority you can check it using getPriority() method of the Thread class.

  • setPriority(int newPriority)- Changes the priority of this thread. Here newPriority is the priority to set this thread to. If the priority is not in the range MIN_PRIORITY to MAX_PRIORITY, IllegalArgumentException is thrown.
  • getPriority()- Returns the priority of the thread that has called this method.

Java thread priority is in the range 1 to 10 where 1 being the lowest and 10 being the highest thread priority in Java.

In Java Thread class there are three static int fields defining min, max and default priority of a thread.

  • MAX_PRIORITY- The maximum priority that a thread can have. Its value is 10.
  • MIN_PRIORITY- The minimum priority that a thread can have. Value of this field is 1.
  • NORM_PRIORITY- The default priority that is assigned to a thread. Its value is 5.

Java thread priority example

Here is an example program showing the thread priorities in Java. Three threads are created here and initially the original priority of those threads is displayed using the getPriority() method then the priority is changed using the setPriority() method.

class NumThread implements Runnable{
  @Override
  public void run() {
    System.out.println("Priority of " + Thread.currentThread().getName() + " is " + Thread.currentThread().getPriority());
    for (int i = 0; i < 5; i++) {
      System.out.println(Thread.currentThread().getName() + " : " + i);
    } 
  }
}

public class ThreadPriority {
  public static void main(String[] args) {
    // Creating threads
    Thread t1 = new Thread(new NumThread(), "Thread-1");
    Thread t2 = new Thread(new NumThread(), "Thread-2");
    Thread t3 = new Thread(new NumThread(), "Thread-3");
    
    System.out.println("Original priority of Thread-1: " + t1.getPriority());
    System.out.println("Original priority of Thread-2: " + t2.getPriority());
    System.out.println("Original priority of Thread-3: " + t3.getPriority());
    // Changing thread's priority
    t1.setPriority(Thread.MIN_PRIORITY);
    t2.setPriority(3);
    t3.setPriority(Thread.MAX_PRIORITY);
    
    t1.start();
    t2.start(); 
    t3.start();
  }
}
Output
Original priority of Thread-1: 5
Original priority of Thread-2: 5
Original priority of Thread-3: 5
Priority of Thread-3 is 10
Thread-3 : 0
Thread-3 : 1
Thread-3 : 2
Thread-3 : 3
Thread-3 : 4
Priority of Thread-2 is 3
Thread-2 : 0
Thread-2 : 1
Thread-2 : 2
Thread-2 : 3
Thread-2 : 4
Priority of Thread-1 is 1
Thread-1 : 0
Thread-1 : 1
Thread-1 : 2
Thread-1 : 3
Thread-1 : 4

You can see in the output that the thread with the highest priority is executed first. But that may not always be the case and you may get different output too as the platform Java is running on is also one of the factor as that platform may have a different implementation for multi-tasking.

Thread priority is platform dependent

The platform, Java is running on may have different priority levels for threads resulting in more or less priority levels than the thread priority level in Java. In that case JVM tries to map the Java thread priority to the priority level of the OS.

That's all for the topic Thread Priority in Java With Examples. If something is missing or you have something to share about the topic please write a comment.


You may also like

February 23, 2021

Daemon Thread in Java

Daemon thread in Java is a thread that runs in background to perform some tasks for the program as long as the program is running. Even if daemon threads are running that doesn’t prevent JVM from shutting down.

Features of daemon thread in Java

  1. The Java Virtual Machine exits when the only threads running are all daemon threads. So, the JVM waits only for the non-demon threads in a program to complete.

    That is why daemon threads in Java are suitable for performing general tasks like clearing the in-memory cache which may be essential to a program but not the main part of the program. Even the JVM, when it starts, creates daemon threads for garbage collection and other book keeping tasks and a non-daemon main thread for executing the program. That is also the reason why JVM doesn’t wait for daemon threads to finish as daemon thread in Java is supposed to perform some background tasks for the user threads. If user threads have completed there is no sense in executing the daemon thread.

  2. Whether a thread is daemon or not that property is inherited from the thread that spawned the other thread. Since main thread in Java is non-daemon so any thread spawned in main thread will be non-daemon.
  3. Same way any thread created by a daemon thread is automatically a daemon thread.
  4. If you want to mark a thread as either a daemon thread or a user thread that can be done using setDaemon(boolean on) method of the Thread class in Java. This method can only be called before the thread has been started i.e. before calling thread.start() method. Otherwise IllegalThreadStateException is thrown.
  5. Another method of the Thread class isDaemon() tests if thread is a daemon thread. Returns true is calling thread is a daemon thread; false otherwise.

Daemon thread Java example

In the example code there are two thread classes DaemonThread and AnotherDaemon. Initially when a DaemonThread instance is created it would be a non-daemon thread as it is created in main thread which itself is non-daemon, later it is changed to a daemon thread using setDaemon() method. On the other hand instance of AnotherDaemon would be a daemon thread as it is created in DaemonThread which is now a daemon thread.

class DaemonThread extends Thread{
  public void run() {
    // Creating another thread from a demon thread
    Thread ad = new AnotherDaemon();
    System.out.println("DaemonThread daemon -- " + isDaemon());
    System.out.println("AnotherDaemon daemon -- " + ad.isDaemon());
  }
}

class AnotherDaemon extends Thread{
  public void run() {
    System.out.println("AnotherDaemon thread run() method");
  }
}

public class TestThread {
	
  public static void main(String[] args) {
    Thread dt = new DaemonThread();
    System.out.println("DaemonThread daemon -- " + dt.isDaemon());
    // marking as daemon thread
    dt.setDaemon(true);
    dt.start();
    try {
      // delay to let the daemon thread execute, 
      // otherwise JVM exits after completing the
      // execution of the main thread.
      Thread.sleep(1000);
    } catch (InterruptedException e) {
      // TODO Auto-generated catch block
      e.printStackTrace();
    }
  }
}
Output
DaemonThread daemon -- false
DaemonThread daemon -- true
AnotherDaemon daemon -- true

That's all for the topic Daemon Thread in Java. If something is missing or you have something to share about the topic please write a comment.


You may also like

February 22, 2021

Main Thread in Java

Java is one of the first programming language to provide built-in support for multi-threading. In fact when a Java program starts one thread starts running immediately that thread is known as main thread in Java.

If you ever tried to run a Java program with compilation errors you would have seen the mentioning of main thread. Here is a simple Java program that tries to call the non-existent getValue() method.

public class TestThread {	
  public static void main(String[] args) {
    TestThread t = new TestThread();
    t.getValue();
  }
}
Exception in thread "main" java.lang.Error: Unresolved compilation problem: 
  The method getValue() is undefined for the type TestThread

As you can see in the error when the program is executed, main thread starts running and that has encountered a compilation problem.

Java Main Thread

Main thread in Java is important as your Java program will start running on this thread. Additional threads spawned in your program will inherit some of the properties from the main thread like thread priority, creating threads as non-daemon threads as main thread is a non-daemon thread.

By default name of the main thread is "main" and the thread priority of main thread is 5. This main thread belongs to a thread group called main.

The Java Virtual Machine continues to execute threads until all threads that are not daemon threads have died. If you have spawned other threads in your program that are non-daemon then main thread may terminate before those threads. Let’s see a Java example to clarify these statements.

Main thread Java example

In the program we’ll display the name of the thread in the main method and using isAlive() method it is also verified whether thread is still alive or terminated.

Three more threads are also spawned, in order to keep checking on the status of the main thread its reference is sent to the class that implements Runnable.

class NumThread implements Runnable{
  Thread thread;
  public NumThread(Thread thread) {
    this.thread = thread;
  }
  @Override
  public void run() {
    for (int i = 0; i < 5; i++) {
      System.out.println(Thread.currentThread().getName() + " : " + i);
    } 
    System.out.println("Thread name " + thread.getName());
    System.out.println("Main Thread Status " + thread.isAlive());
  }
}

public class ThreadPriority {
  public static void main(String[] args) {
    // Information about main thread
    System.out.println("Thread name- " + Thread.currentThread().getName());
    System.out.println("Priority of " + Thread.currentThread().getName() + " thread is " + Thread.currentThread().getPriority());
    System.out.println("Group " + Thread.currentThread().getName() + " thread belongs to- " + Thread.currentThread().getThreadGroup());
    // Creating threads
    Thread t1 = new Thread(new NumThread(Thread.currentThread()), "Thread-1");
    Thread t2 = new Thread(new NumThread(Thread.currentThread()), "Thread-2");
    Thread t3 = new Thread(new NumThread(Thread.currentThread()), "Thread-3");
    t1.start();
    t2.start(); 
    t3.start();
    System.out.println("Thread name " + Thread.currentThread().getName());
    System.out.println("Thread name " + Thread.currentThread().isAlive());
  }
}
Output
Thread name- main
Priority of main thread is 5
Group main thread belongs to- java.lang.ThreadGroup[name=main,maxpri=10]
Thread name main
Thread name true
Thread-1 : 0
Thread-1 : 1
Thread-1 : 2
Thread-1 : 3
Thread-1 : 4
Thread name main
Main Thread Status false
Thread-3 : 0
Thread-3 : 1
Thread-3 : 2
Thread-3 : 3
Thread-3 : 4
Thread name main
Main Thread Status false
Thread-2 : 0
Thread-2 : 1
Thread-2 : 2
Thread-2 : 3
Thread-2 : 4
Thread name main
Main Thread Status false

As you can see from the output priority of the main thread is 5 and the thread group is also main. main You can also verify that the main thread is terminated while other threads are still executing.

That's all for the topic Main Thread in Java. If something is missing or you have something to share about the topic please write a comment.


You may also like

How to Create And Start Thread in Java

In order to create a thread in Java you need to get an instance of java.lang.Thread class. You can do it in two ways.

  1. By implementing Runnable interface.
  2. By Extending Thread class.

Whichever of these two ways is chosen by you to create a thread in Java you need to override run() method and provide the code that will run in that thread. Thread’s run() method will be executed once you call start() method on the created thread.

Creating and starting thread in Java involves the following steps.

  1. Get an instance of the Thread class.
  2. Call start method on the created thread object- thread.start();
  3. Once the thread is started run method will be executed.

Creating thread by implementing Runnable interface

One of the ways to create a thread in Java is to implement the Runnable interface.

Runnable interface is a functional interface in Java with a single method run() which has to be implemented.

@FunctionalInterface
public interface Runnable {
  public abstract void run();
}
Example code using Runnable
public class TestThread implements Runnable {
  @Override
  public void run() {
    System.out.println("Executing run method");
  }
}

At this stage you have a class of type Runnable (not yet of type Thread). Thread class has constructors where you can pass Runnable as a parameter, using one of those constructors you can get a thread instance.

Two of those constructors which are normally used to create a thread are as follows-

  • Thread(Runnable target)
  • Thread(Runnable target, String name)

You need to pass the Runnable instance to one of these constructors to create a thread. Following code shows how you can do it.

public class ThreadDemo {
  public static void main(String[] args) {
    // Passing an instance of type runnable 
    Thread thread = new Thread(new TestThread());
    thread.start();
  }
}

Running this code will instantiate a thread and start it. Ultimately the run() method will be executed by the thread.

Output
Executing run method

Creating thread by extending Thread class

Another way to create thread in Java is to subclass the Thread class and override the run method. Then you can create an instance of that class and call start() method.

public class TestThread extends Thread {
  @Override
  public void run() {
    System.out.println("Executing run method");
  }
  public static void main(String[] args) {
    TestThread thread = new TestThread();
    thread.start();
  }
}
Output
Executing run method

Which of these approach to choose

Since there are two ways to create thread in Java so the question arises which of these two approach should be used. The preferred way is to implement Runnable interface.

When you implement Runnable interface you still have a choice to extend another class as you are not extending Thread class. Note that in Java you can extend only one class.

Thread class has many other methods except run() method but mostly you will just override run() method and provide the code that has to be executed by the Thread. Same thing can be done by implementing Runnable interface. If you are not modifying or enhancing any other method of the Thread class then why extend it.

Using anonymous class to implement run() method

When creating thread in Java by extending Thread class or implementing Runnable interface, you can also use anonymous class to implement run method.

When extending Thread class

We can have an anonymous inner class that extends a class without actually extending that class. You can create an anonymous inner class and provide run method implementation there.

public class TestThread {
  public static void main(String[] args) {
    //  anonymous inner class
    Thread thread = new Thread(){
      @Override
      public void run() {
        System.out.println("Executing run method");
      }
    };
    thread.start();
  }
}
When implementing Runnable interface
public class TestThread {
  public static void main(String[] args) {
    new Thread(new Runnable() {
      @Override
      public void run() {
        System.out.println("Executing run method");
      }
    }).start();
  }
}
Implementing Runnable as a lambda expression

Since Runnable is a functional interface it can also be implemented as a lambda expression Java 8 onward.

public class TestThread {
  public static void main(String[] args) {
    Runnable r = () -> {System.out.println("Executing run method");};
    // passing runnable instance
    new Thread(r).start();
  }
}

That's all for the topic How to Create And Start Thread in Java. If something is missing or you have something to share about the topic please write a comment.


You may also like

February 20, 2021

Multithreading in Java Tutorial

You would have seen a lot of examples of multi-tasking where computer programs are handling more than one task at a time. For example- You can start a player and play songs while working on any editor and have a document of 100 pages getting printed at the same time. This is an example where separate processes are running concurrently. Same way with in the same program you can have several tasks running like in a song player you can start playing a song and at the same time click on "add song" button to add more songs to your playlist. With in a program these separate running tasks are called threads and this concept of dividing a program into separate sub-tasks to make it faster and more responsive is called multi-threading.

Multithreading in Java

Java is one of the first programming language to provide in-built support for multi-threading programming.

In Java multithreading the main class is Thread class, any thread in Java is an object of Thread class and the code that is executed by the thread is provided in the run() method of the Thread class. You will need to override the run() method and provide the required functionality.

Refer How to Create And Start Thread in Java to see the ways thread can be created in Java.

When a Java application starts you start with just one thread, called the Main Thread in Java. This thread has the ability to create additional threads, which can perform specific tasks. You will have to divide your application in such a way that separate sub-tasks can be performed by separate threads rather than main thread performing all the tasks.

Multithreading Java Example

Here is a Java program that shows creating a thread by implementing Runnable interface and also shows the main thread. Once you call the start() method of the thread you have created, it executes the run() method and displays the name of the thread. Once that thread is terminated control again goes to main thread whose name is also displayed.

class AnotherThread implements Runnable{
  @Override
  public void run() {
    System.out.println("run method of Another thread --" 
      + Thread.currentThread().getName());	
  }	
}

public class ThreadDemo {
  public static void main(String[] args) {
    Thread thread = new Thread(new AnotherThread(), "AnotherThread");
    thread.start();
    System.out.println("Main thread " + Thread.currentThread().getName());
  }
}
Output
Main thread main
run method of Another thread –AnotherThread

Life cycle of a thread in Java multithreading

In Java multithreading a thread can go through many states of existence. Once you call start() method on a thread it is in a runnable state. Once it starts running it can be suspended and the control given to another thread. A suspended thread can again resume its operation. A thread can also be in blocked state if it is waiting for a shared resource. Once thread has finished its operation it is terminated.

Refer Life Cycle of a Thread (Thread States) in Java to know more about thread states in Java.

Difference between thread and process

As stated in the beginning itself, in concurrent programming there are two types of multitasking-

  • Process based multitasking.
  • Thread based multitasking.

Though this tutorial is about multithreading in Java, for better understanding you should know the difference between thread and process in Java.

Thread Vs Process in Java
  1. A process has a self-contained execution environment. A process has its own run-time resources like memory space. Threads exist within a process — every process has at least one. Threads share the process's resources, including memory and open files.
  2. Processes are heavyweight tasks running in their own allocated memory space. Threads are lightweight spawned with in a process and share its memory.
  3. Processes are independent units with their own separate resources so inter-process communication is expensive. Threads share the resources with in a process so inter-thread communication is easy but at the same time require special attention to safe guard shared resources among threads.
  4. Context switching from one process to another is time-consuming as it is time consuming to save the state of the running process. Context switching among threads is not that time consuming.
multithreading in Java

That's all for the topic Multithreading in Java Tutorial. If something is missing or you have something to share about the topic please write a comment.


You may also like

February 17, 2021

How to Create Thread in Python

In Python, threading module has a Thread class which is used for creating thread. There are two ways to create a new Thread in Python.

  1. By creating Thread instance and passing the function that has to be executed as one of the argument to the constructor of the Thread.
  2. By creating a class that extends Thread class and overrides run method.

1. Python thread creation using threading.Thread() constructor

In Python you don’t have to always create classes. You can just create a Python file with functions for some scripting purposes. In such scenario if you want to take advantage of multi-threading, threading.Thread() is the way to go (Though you can use it with classes too). You need to pass the function that has to be executed as one of the argument to the constructor of the Thread.

Full constructor call with all the arguments is as given below-

threading.Thread(group=None, target=None, name=None, 
           args=(), kwargs={}, *, daemon=None)

This constructor should always be called with keyword arguments. Arguments are:

  • group should be None. This argument is reserved for future extension
  • target is the function that has to be invoked. Defaults to None, meaning nothing is called.
  • name is the thread name. By default, a unique name is constructed of the form “Thread-N” where N is a decimal number.
  • args is the argument passed to the target function. It is passed as a tuple. Defaults to ().
  • kwargs is a dictionary of keyword arguments passed to the target function. Defaults to {}.
  • daemon if set to True runs the thread as a daemon thread. If None (the default), the daemonic property is inherited from the current thread.

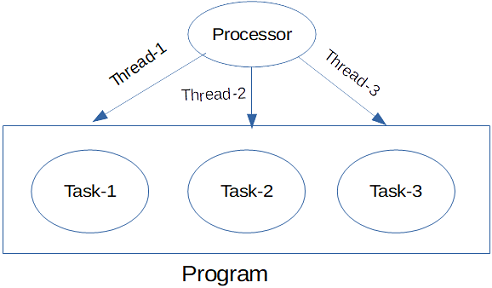
Let us write a Python program to understand how to create thread using threading.Thread(). In the example there are two functions and three threads are spawned.

import threading

def print_thread_info():
  print('Thread Name: ' + threading.current_thread().name)

def add(a, b):
  result = a + b
  print('Thread Name: ' + threading.current_thread().name + ' Sum is', result)


if __name__ == "__main__":
  # Creating threads
  t1 = threading.Thread(target=print_thread_info)
  t2 = threading.Thread(target=add, name='MyThread-1', args=(4, 5))
  t3 = threading.Thread(target=add, name='MyThread-2', args=(19, 28))
  # starting threads
  t1.start()
  t2.start()
  t3.start()
Output
Thread Name: Thread-1
Thread Name: MyThread-1 Sum is  9
Thread Name: MyThread-2 Sum is  47

In the program points to note are-

  • Since you are using multi-threading so threading module has to be imported.
    import threading
    
  • In the first instance target function is print_thread_info no other argument is passed so defaults will be used for other arguments.
  • For the other two Thread instances target function is sum, argument to the function are passed using args and thread name is also passed.
  • To start thread’s activity start() method has to be invoked on a thread. Once the thread is started it arranges for the object’s run() method to be invoked in a separate thread of control.
  • run() method invokes the callable object passed to the object’s constructor as the target argument.

2. Python thread creation using threading.Thread() constructor where methods of a class is invoked

As mentioned above you can also use threading.Thread() constructor where target is a method of a class. In that case you will have to create object of the class and pass object_name.method_name as target. In the example there is a class ThreadDemo with two methods. Then an object obj of the class is created so the target can be specified as obj.print_thread_info or obj.sum

import threading

class ThreadDemo:

    def print_thread_info(self):
        print('Thread Name: ' + threading.current_thread().name)

    def add(self, a, b):
        result = a + b
        print('Thread Name: ' + threading.current_thread().name + ' Sum is', result)


obj = ThreadDemo()
t1 = threading.Thread(target=obj.print_thread_info)
t2 = threading.Thread(target=obj.add, name='MyThread-1', args=(4, 5))
t3 = threading.Thread(target=obj.add, name='MyThread-2', args=(19, 28))
# starting threads
t1.start()
t2.start()
t3.start()
Output
Thread Name: Thread-1
Thread Name: MyThread-1 Sum is 9
Thread Name: MyThread-2 Sum is 47

3. Python Thread creation using class that extends Thread class

You can create a class extending Thread class which makes your class also of type Thread. In your subclass override the run() method of the Thread class and provide the functionality that you want to be executed by the threads. When you will create instance of your class (which is also of type Thread because of inheritance) and call start() method, threads will execute the overridden run() method of this class.

import threading

# inherit from Thread class
class MyThread(threading.Thread):
    def __init__(self, msg):
        # Calling Thread class constructor
        super().__init__()
        self.msg = msg

    def run(self):
        print('Message is- ' + self.msg)

# Creating thread
t1 = MyThread('Executing Thread')
t2 = MyThread('Executing Another Thread')
# starting thread
t1.start()
t2.start()
Output
Message is- Executing Thread
Message is- Executing Another Thread

In the program points to note are-

  • Thread class is extended by the class so MyThread class inherits class members of Thread class.
  • run() method is overridden and that is where you write the logic that has to be executed by a thread.
  • In the constructor (__init__()) super() function is used to call parent class constructor.
  • When you create instance of your MyThread class those objects are also of type Thread as Thread class is the parent class.
  • To start thread’s activity start() method has to be invoked on a thread which arranges for the object’s run() method to be invoked in a separate thread of control. The start() method must be called at most once per thread object.

That's all for the topic How to Create Thread in Python. If something is missing or you have something to share about the topic please write a comment.


You may also like

February 16, 2021

Python Multi-threading Tutorial

In this tutorial we’ll see the support for multi-threading in Python.

What is multi-tasking

In concurrent programming there are two types of multitasking-

  1. Process based multitasking
  2. Thread based multitasking

Process based multitasking

We run a lot of processes simultaneously on our computer for example working on a word document while playing songs and also having some sites opened in a browser. This is an example of running separate processes concurrently. Here just to clarify it, with a single processor only a single process is executed by a processor at any given time. Processor divides its execution time between different processes and executes them for the given time slice, that’s why term "time slicing" is also used.

For example if there are three processes loaded into memory and all of them have to be executed then processor may divide 1 millisecond into the slices of 1/3 millisecond each and execute them in parallel, though the context switching between processes happen so fast that as a user we get a feel that all the processes are running simultaneously or concurrently.

Process based multitasking

A process has a self-contained execution environment. A process has its own run-time resources like memory space so processes are considered heavyweight tasks.

Thread based multitasking

With in a same program you can have several tasks running like in a song player you can start playing a song and at the same time you can add more songs to your playlist. With in a program you can spawn separate threads to execute separate tasks. This concept of dividing a program into separate sub-tasks and using separate threads to execute these sub-tasks to make overall execution faster and your program more responsive is known as multi-threading.

Thread based multitasking

Threads are considered lightweight processes that are spawned with in a process and share its memory and processor time.

Multi-threading in Python

Python has in-built support for multi-threading programming in the form of threading module. The threading module has a Thread class which encapsulates thread functionality.

You can create a Thread object using one of the following ways-

  1. By creating Thread instance and passing the function that has to be executed as one of the argument to the constructor of the Thread.
  2. By creating a class that extends Thread class and overrides run method.

Once a thread object is created, its activity must be started by calling the thread’s start() method. This invokes the run() method in a separate thread of control.

Python thread creation example

1. In the following example we’ll call threading.Thread() to create Thread instance. We’ll create two Thread instances to show how you can pass arguments (passing argument is optional) to the target function.

import threading

def print_thread_info():
    print('Thread Name: ' + threading.current_thread().name)


def print_message(msg):
    print('From Thread: ' + threading.current_thread().name + ' Message is- ' + msg)


if __name__ == "__main__":
    # Creating threads
    t1 = threading.Thread(target=print_thread_info)
    t2 = threading.Thread(target=print_message, name='MyThread', args=('Hello I am a thread',))
    # starting threads
    t1.start()
    t2.start()
Output
Thread Name: Thread-1
From Thread: MyThread Message is- Hello I am a thread

In the program points to note are-

    • Since you are using multi-threading so threading module has to be imported.
      import threading
      
    • Thread instances are created using threading.Thread() constructor. In the first instance only target function (function to be executed by thread) is passed. In the second instance apart from target function, thread name and arguments to the target function are also passed.
    • To start thread’s activity start() method has to be invoked on a thread.

2. In the following example we’ll subclass Thread class and override run() method.

import threading

class MyThread(threading.Thread):
  def run(self):
    print('In run method Thread Name: ' + threading.current_thread().name)

# Creating thread
t1 = MyThread()
# starting thread
t1.start()
Output
In run method Thread Name: Thread-1

In the program points to note are-

  • Thread class is extended by the class so MyThread class is also of type Thread.
  • run() method is overridden and that is where you write the logic that has to be executed by a thread.
  • To start thread’s activity start() method has to be invoked on a thread which arranges for the object’s run() method to be invoked in a separate thread of control. The start() method must be called at most once per thread object.

Python Thread class methods

Some of the important methods and properties available in the Thread class are as following.

Method Description
start() Start the thread. This method must be called at most once per thread object. Once the thread is started it arranges for the object’s run() method to be invoked in a separate thread of control.
run() This method has the code that is executed by a thread. You may override this method in a subclass. If thread instance is created using threading.Thread() constructor then run() method invokes the callable object passed to the object’s constructor as the target argument.
join(timeout) This method blocks the calling thread until the thread whose join() method is called terminates
name Property that represents thread name.
setName(name) Method for setting thread name
getName() Method for getting thread name. It is recommended to use name property directly instead of these getter/setter methods.
is_alive() Returns True if the thread is alive False otherwise
daemon A boolean value indicating whether this thread is a daemon thread (True) or not (False).
isDaemon() Method for getting if the thread is a daemon thread or not. Returns True if it is False otherwise.
setDaemon(flag) Setting a thread as a daemon thread by passing True. It is recommended to use daemon property directly rather than these getter/setter methods.

Main thread in Python

When you write a Python program, Python Virtual Machine (PVM) starts a new thread to execute the statements in your program. Which means whenever any Python program is executing one thread is always started that thread is known as main thread in Python. Following example prints the name of currently executing thread.

import threading

def print_info():
    print('Thread Name: ' + threading.current_thread().name)

print_info()
Output
Thread Name: MainThread

As you can see in the program no thread is created explicitly still MainThread is started.

There is also a threading.main_thread() method (available Python 3.4 onward) which returns the main thread object.

import threading

def print_info():
    #print('Thread Name: ' + threading.current_thread().name)
    if threading.current_thread() is threading.main_thread():
        print('Current thread is main thread')

print_info()
Output
Current thread is main thread

That's all for the topic Python Multi-threading Tutorial. If something is missing or you have something to share about the topic please write a comment.


You may also like

February 15, 2021

How to Unzip a File in Java

When you zip a file in Java there are different logic based on whether you are zipping a file or you are zipping a folder in Java where the whole directory structure is archived. But unzipping a file in Java doesn’t need such different functionalities. One Java program to unzip a file takes care of all the different functionalities.

Unzip a file – Java program

To unzip a file you need to follow the following steps-

  • Read the compressed file from the zipped archive. For that java.util.zip.ZipInputStream class is used.
  • From the ZipInputStream, zip entries for the files and directories are read using getNextEntry() method.
  • If the entry is for a directory then you just need to create the directory. If the entry is for file then read the content of the file and write it to the destination file.
  • Close the current entry using the closeEntry() method.
  • Once all the zip entries are iterated close the input and output streams.
public class UnzipFile {
  private static final int BUFFER = 2048;
  public static void main(String[] args) {
    final String SOURCE_ZIPDIR = "F:/knpcode/Parent.zip";
    // creating the destination dir using the zip file path
    // by truncating the ".zip" part
    String DESTINATION_DIR = SOURCE_ZIPDIR.substring(0, SOURCE_ZIPDIR.lastIndexOf('.'));
    //System.out.println("" + DESTINATION_DIR);
    extract(SOURCE_ZIPDIR, DESTINATION_DIR);
  }
	
  private static void extract(String source, String dest){
    try {
      File root = new File(dest);
      if(!root.exists()){
        root.mkdir();
      }
      BufferedOutputStream bos = null;
      // zipped input
      FileInputStream fis = new FileInputStream(source);
      ZipInputStream zis = new ZipInputStream(new BufferedInputStream(fis));
      ZipEntry entry;
      while((entry = zis.getNextEntry()) != null) {
        String fileName = entry.getName();
        File file = new File(dest + File.separator + fileName);
        if (!entry.isDirectory()) {
          extractFileContentFromArchive(file, zis);
        }
        else{
          if(!file.exists()){
            file.mkdirs();
          }
        }
        zis.closeEntry();
      }
      zis.close();
    } catch(Exception e) {
      e.printStackTrace();
    }
  }
	
  private static void extractFileContentFromArchive(File file, ZipInputStream zis) throws IOException{
    FileOutputStream fos = new FileOutputStream(file);
    BufferedOutputStream bos = new BufferedOutputStream(fos, BUFFER);
    int len = 0;
    byte data[] = new byte[BUFFER];
    while ((len = zis.read(data, 0, BUFFER)) != -1) {
      bos.write(data, 0, len);
    }
    bos.flush();
    bos.close();
  }
}

That's all for the topic How to Unzip a File in Java. If something is missing or you have something to share about the topic please write a comment.


You may also like

February 14, 2021

How to Zip a Folder in Java

In the post How to Zip Files in Java we have seen how to zip a single file or multiple files in Java but you may also need to zip a folder in Java where you also retain the folder tree structure while zipping it. This post shows how to zip a folder in Java where the zip archive contains the whole tree structure (files and subdirectories).

Options for zipping a folder in Java

For zipping a folder with all its subfolders and files two options are given in this post.

  1. Using Files.walkFileTree method- Using this method you can recursively visit all the files in a file tree. An implementation of FileVisitor interface is provided to the Files.walkFileTree method to visit each file in a file tree. This option is available Java 7 onward. See example.
  2. By providing the code yourself to read the files with in a folder recursively by using listFiles() method in java.io.File class. See example.

Check this post How to Unzip a File in Java to see how to unzip files and folders in Java.

Directory structure used

Java programs shown here to zip a folder in Java use the following directory structure.

zip a folder in Java

With in the parent folder there is one sub folder Child with two files and one file is stored in the parent folder. The zipped archive should retain the same tree structure.

Using Files.walkFileTree method to zip a folder in Java

One of the argument of this method is a FileVisitor interface. You do need to provide implementation of this interface as per your requirement. FileVisitor interface has four methods, for zipping a folder you do need to implement two of them.

  • preVisitDirectory– Invoked before a directory's entries are visited. By implementing this method you can create the visited folder with in the zip archive.
  • visitFile– Invoked on the file being visited. By implementing this method you can add each visited file to the zip archive.
import java.io.FileOutputStream;
import java.io.IOException;
import java.nio.file.SimpleFileVisitor;
import java.nio.file.FileVisitResult;
import java.nio.file.Files;
import java.nio.file.Path;
import java.nio.file.Paths;
import java.util.zip.ZipOutputStream;
import java.nio.file.attribute.BasicFileAttributes;
import java.util.zip.ZipEntry;

public class ZipFolder {
  public static void main(String[] args) {
    // Source folder
    final String SOURCE_DIR = "F:/knpcode/Parent";
    // creating the name of the zipped archive
    String ZIP_DIR = SOURCE_DIR.concat(".zip");
    zipFolderStructure(SOURCE_DIR, ZIP_DIR);
  }
    
  private static void zipFolderStructure(String sourceFolder, String zipFolder){
    // Creating a ZipOutputStream by wrapping a FileOutputStream
    try (FileOutputStream fos = new FileOutputStream(zipFolder); 
         ZipOutputStream zos = new ZipOutputStream(fos)) {
      Path sourcePath = Paths.get(sourceFolder);
      // Walk the tree structure using WalkFileTree method
      Files.walkFileTree(sourcePath, new SimpleFileVisitor<Path>(){
        @Override
        // Before visiting the directory create the directory in zip archive
        public FileVisitResult preVisitDirectory(final Path dir, final BasicFileAttributes attrs) throws IOException {
          // Don't create dir for root folder as it is already created with .zip name 
          if(!sourcePath.equals(dir)){
            System.out.println("Directory- " + dir);
            zos.putNextEntry(new ZipEntry(sourcePath.relativize(dir).toString() + "/"));                  
            zos.closeEntry();    
          }
          return FileVisitResult.CONTINUE;
        }
        @Override
        // For each visited file add it to zip entry
        public FileVisitResult visitFile(final Path file, final BasicFileAttributes attrs) throws IOException {
          System.out.println("File Name- " + sourcePath.relativize(file).toString());
          zos.putNextEntry(new ZipEntry(sourcePath.relativize(file).toString()));
          Files.copy(file, zos);
          zos.closeEntry();
          return FileVisitResult.CONTINUE;
        }});
    } catch (IOException e) {
      // TODO Auto-generated catch block
      e.printStackTrace();
    }
  }
}
Output
Directory- F:\knpcode\Parent\Child
File Name- Child\hello.txt
File Name- Child\Project.docx
File Name- Test.txt

Zip a folder in Java by listing files recursively

In the code you first create a list of all the files and folders residing with in a parent folder. To go through the list of files with in a directory listFiles() method of java.io.File class is used.

Once you have this folder tree structure in a list you iterate through that list to create a zip archive. For every iterated element of the list you check if it is a directory or a file-

  • If it is a directory then you just add the name of the directory in the zip archive.
  • If it is a file then you add the name as well as the content of the file.
public class ZippingFolder {
  List fileList = new ArrayList();
  public static void main(String[] args) {	
    // Source folder
    final String ROOT_DIR = "F:/knpcode/Parent";
    // creating the name of the zipped archive
    String ZIP_DIR = ROOT_DIR.concat(".zip");
    ZippingFolder zippingFolder = new ZippingFolder();
    // get the list of the whole folder structure
    zippingFolder.getListOfFiles(new File(ROOT_DIR));
    zippingFolder.zipTreeStructure(ROOT_DIR, ZIP_DIR);
  }
	
  private void zipTreeStructure(String ROOT_DIR, String zipDir){
    final int BUFFER = 1024;
    BufferedInputStream bis = null;
    ZipOutputStream zos = null;
    try{
      // Creating ZipOutputStream by wrapping FileOutputStream
      FileOutputStream fos = new FileOutputStream(zipDir);
      zos = new ZipOutputStream(fos);
      // iterating the folder tree structure
      for(File file : fileList){
        // If directory
        if(file.isDirectory()){
          // add the directory name as zipentry
          ZipEntry ze = new ZipEntry(file.getName()+"/");             
          zos.putNextEntry(ze);
          zos.closeEntry();
        }
        // If file
        else{
          FileInputStream fis = new FileInputStream(file);
          bis = new BufferedInputStream(fis, BUFFER);                
          ZipEntry ze = new ZipEntry(getFileName(ROOT_DIR, file.toString()));                   
          zos.putNextEntry(ze);
          byte data[] = new byte[BUFFER];
          int count;
          while((count = bis.read(data, 0, BUFFER)) != -1) {
            zos.write(data, 0, count);
          }
          bis.close();
          zos.closeEntry();
        }               
      }                
           
    }catch(IOException ioExp){
      ioExp.printStackTrace();
    } finally{
      try {
        zos.close(); 
        if(bis != null)
          bis.close();
      } catch (IOException e) {
        // TODO Auto-generated catch block
        e.printStackTrace();
      }  
    }
  }
  // Method to get the folder tree structure
  private void getListOfFiles(File source){
    File[] fileNames = source.listFiles();
    for(File file : fileNames){
      if(file.isDirectory()){
        fileList.add(file);
        // recursive call to go through the subdirectory structure
        getListOfFiles(file);
      }else{
        fileList.add(file);
      }
    }
  }
    
  // To get the relative file path 
  private String getFileName(String ROOT_DIR, String filePath){
    String name = filePath.substring(ROOT_DIR.length() + 1, filePath.length());
    return name;
  }
}

That's all for the topic How to Zip a Folder in Java. If something is missing or you have something to share about the topic please write a comment.


You may also like

How to Zip Files in Java

This post shows how you can zip files in Java. Using the options given here you can zip a single file or more than one file by specifying all those files.

Zip a file in Java

To zip files in Java there are two options-

  1. Using ZipOutputStream and ZipEntry classes residing in java.util.zip package.
  2. Using the Zip File System Provider- The zip file system provider treats a zip or JAR file as a file system and provides the ability to manipulate the contents of the file. The zip file system provider was introduced in the JDK 7 release.

Want to zip a folder, check this post How to Zip a Folder in Java

Zipping single fie in Java using ZipOutputStream

The steps for zipping a file using ZipOutputStream are as follows-

  • Create an InputStream for reading the source file.
  • Create an OutputStream for the zip file and wrap it in a ZipOutputStream object.
  • Create a ZipEntry instance for the source file and add it to the ZipOutputStream.
  • Read data from the source file and write it to the ZIP file.
  • Close the streams.
public class ZipFile {
  public static void main(String[] args) {
    // source file
    String fileName = "F:\\knpcode\\links.txt";
    File file = new File(fileName);
    //Creating zipfile name from fileName by 
    // truncating .txt and appending .zip
    String zipFilename = fileName.substring(0, fileName.indexOf('.')) + ".zip";
    File zipFile = new File(zipFilename);
    zipFile(file, zipFile);
  }
	
  // Method to zip file
  private static void zipFile(File file, File zippedFile){
    final int BUFFER = 1024;
    ZipOutputStream zos = null;
    BufferedInputStream bis = null;
    try{
      FileInputStream fis = new FileInputStream(file);
      bis = new BufferedInputStream(fis, BUFFER);          
      // Creating ZipOutputStream for writing to zip file
      FileOutputStream fos = new FileOutputStream(zippedFile);
      zos = new ZipOutputStream(fos);
      // Each file in the zipped archive is represented by a ZipEntry 
      // Only source file name is needed 
      ZipEntry ze = new ZipEntry(file.getName());        
      zos.putNextEntry(ze);
      byte data[] = new byte[BUFFER];
      int count;
      while((count = bis.read(data, 0, BUFFER)) != -1) {
        zos.write(data, 0, count);
      }                     
    } catch (IOException e) {
      // TODO Auto-generated catch block
      e.printStackTrace();
    }finally{
      try {
        zos.close();
        bis.close();
      } catch (IOException e) {
        // TODO Auto-generated catch block
        e.printStackTrace();
      }  
    }
  }
}

Zipping single fie in Java using Zip File System Provider

You can use the factory methods of the java.nio.file.FileSystems class to create a new zip file system or to obtain a reference to an existing zip file system.

You can create a zip file system by specifying the path of the zip or JAR file in following way-

URI uri = URI.create("jar:file:/PATH/TO/ZIPFILE");
FileSystem fs = FileSystems.newFileSystem(uri, env);

public class ZipFile {
  public static void main(String[] args) {
    // source file
    String fileName = "F:/knpcode/links.txt";
    //Creating zipfile name from fileName by 
    // truncating .txt and appending .zip
    String zipFilename = fileName.substring(0, fileName.indexOf('.')) + ".zip";
    
    zipFile(fileName, zipFilename);
  }

  private static void zipFile(String file, String zippedFile){
    Map<String, String> env = new HashMap<>(); 
    env.put("create", "true");
    // locate file system by using the syntax 
    // defined in java.net.JarURLConnection
    URI uri = URI.create("jar:file:/" + zippedFile);
    try (FileSystem zipfs = FileSystems.newFileSystem(uri.normalize(), env)) {
      Path sourceFile = Paths.get(file);
      System.out.println("Name-- " + sourceFile.getFileName().toString());
      Path pathInZipfile = zipfs.getPath(sourceFile.getFileName().toString());          
      // copy a file into the zip file
      Files.copy(sourceFile, pathInZipfile, StandardCopyOption.REPLACE_EXISTING ); 
    } catch (IOException e) {
      // TODO Auto-generated catch block
      e.printStackTrace();
    } 
  }
}

Zipping multiple files in Java

Here is an example of zipping multiple files in Java using ZipOutputStream where each source file is added as a ZipEntry to the ZipOutputStream.

public class ZipFile {
  public static void main(String[] args) {
    try {
      // source files
      String file1 = "F:/knpcode/links.txt";
      String file2 = "F:/knpcode/Test/postend.txt";
      // Zipped file name
      String zipFilename = "F:/knpcode/result.zip";
      File zipFile = new File(zipFilename);
      // Creating ZipOutputStream for writing to zip file
      FileOutputStream fos  = new FileOutputStream(zipFile);			
      ZipOutputStream zos = new ZipOutputStream(fos);
      
      zipFile(file1, zos);
      zipFile(file2, zos);
      zos.close();
    } catch (IOException e) {
      // TODO Auto-generated catch block
      e.printStackTrace();
    }
  }
	
  // Method to zip file
  private static void zipFile(String fileName, ZipOutputStream zos) throws IOException{
  final int BUFFER = 1024;
  BufferedInputStream bis = null;
  try{
    File file = new File(fileName);
    FileInputStream fis = new FileInputStream(file);
    bis = new BufferedInputStream(fis, BUFFER);          

    // Each file in the zipped archive is represented by a ZipEntry 
    // Only source file name is needed 
    ZipEntry zipEntry = new ZipEntry(file.getName());        
    zos.putNextEntry(zipEntry);
    byte data[] = new byte[BUFFER];
    int count;
    while((count = bis.read(data, 0, BUFFER)) != -1) {
      zos.write(data, 0, count);
    }    
      zos.closeEntry();
    } finally{
      try {
        bis.close();
      } catch (IOException e) {
        // TODO Auto-generated catch block
        e.printStackTrace();
      }  
    }
  }
}

That's all for the topic How to Zip Files in Java. If something is missing or you have something to share about the topic please write a comment.


You may also like

February 13, 2021

How to Convert float to String in Java

This post shows how you can convert float to String in Java.

Converting float to String using Float.toString() method

Wrapper class Float in Java has toString() method that returns a string representation of the passed float argument.

public class FloatToString {
  public static void main(String[] args) {
    float val = 28.92f;
    String strVal = Float.toString(val);
    System.out.println("Converted String value = " + strVal);
  }
}
Output
Converted String value = 28.92

Convert using String.valueOf() method

String.valueOf(float f)- Returns the string representation of the float argument.

public class FloatToString {
  public static void main(String[] args) {
    float val = 28.92f;
    String strVal = String.valueOf(val);
    System.out.println("Converted String value = " + strVal);
  }
}
Output
Converted String value = 28.92

Converting using String concatenation

You can concatenate the float value with an empty string ("") that will return the result as a String. That's one way to convert float to String

public class FloatToString {
  public static void main(String[] args) {
    float val = 108.256f;
    String strVal = val + "";
    System.out.println("Converted String value = " + strVal);
  }
}
Output
Converted String value = 108.256

Converting using append method of StringBuilder or StringBuffer class

Both StringBuilder and StringBuffer classes have append() method where you can pass float as an argument. The append() method will append the string representation of the float argument to the sequence.

public class FloatToString {
  public static void main(String[] args) {
    float val = -49.12f;
    StringBuilder sb = new StringBuilder();
    sb.append(val);
    System.out.println("Converted String value = " + sb.toString());
  }
}
Output
Converted String value = -49.12

That's all for the topic How to Convert float to String in Java. If something is missing or you have something to share about the topic please write a comment.


You may also like

How to Convert double to int in Java

In this post we’ll see how to convert double to int in Java.

Considerations while converting double to int in Java

While converting double to int two things you need to consider are-

  1. Range of double is much more than the int, if the double you are trying to convert to int is out of range for int then how to handle that.
  2. In double value there are fractional parts where as int doesn’t have fractional part so what to do with fractional part is another thing to consider. Fractional part can be truncated or you need to round the double value to the nearest integer.

Converting using intValue() method or by type casting

You can convert double to int using intValue() method of the Double class (needs a Double object) or by explicitly type casting double value to int. In fact intValue() method implementation also do the type casting and returns the value of this Double as an int after a narrowing primitive conversion. Problem with these two methods is that the rounding to the nearest integer doesn’t happen while converting double to int, fractional part is truncated.

Converting double to int using intValue() method
public class DoubleToInt {
  public static void main(String[] args) {
    Double d = 147.89d;
    int val = d.intValue();
    System.out.println("Converted int value- " + val);
  }
}
Output
Converted int value- 147

Couple of things to note here- double value is truncated while converting it to int and this way of conversion needs an instance of Double class.

Converting double to int using explicit casting
public class DoubleToInt {
  public static void main(String[] args) {
    double d = 147.89d;
    int val = (int)d;
    System.out.println("Converted int value- " + val);
  }
}
Output
Converted int value- 147

Converting double to int with rounding to nearest integer

Though the above two ways convert double to int but truncate the fractional part rather than rounding the double to the nearest integer which is not what you’d want in most of the scenarios. In order to do the rounding you have to use Math.round(double d) method which returns the closest long to the passed argument.

Since the returned value is long so further casting is required to convert the long value to int.

Math.round() method also takes care of the special cases-

  • If the argument is NaN, the result is 0.
  • If the argument is negative infinity or any value less than or equal to the value of Integer.MIN_VALUE, the result is equal to the value of Integer.MIN_VALUE.
  • If the argument is positive infinity or any value greater than or equal to the value of Integer.MAX_VALUE, the result is equal to the value of Integer.MAX_VALUE.

Converting double to int using Math.round()

public class DoubleToInt {
  public static void main(String[] args) {
    double d = 147.89d;
    int val = (int)Math.round(d);
    System.out.println("Converted int value- " + val);
  }
}
Output
Converted int value- 148

As you can see here rounding is done to the nearest integer. Since the returned value from the method Math.round(double d) is long so casting to int is also required.

Example with different double arguments

public class DoubleToInt {
  public static void main(String[] args) {
    double val1 = 1456.12;
    int i1 = (int)Math.round(val1);
    System.out.println("Converted int value- " + i1);
    double val2 = -567.99;
    int i2 = (int)Math.round(val2);
    System.out.println("Converted int value- " + i2);
    double val3 = 236.5646;
    int i3 = (int)Math.round(val3);
    System.out.println("Converted int value- " + i3);
  }
}
Output
Converted int value- 1456
Converted int value- -568
Converted int value- 237

That's all for the topic How to Convert double to int in Java. If something is missing or you have something to share about the topic please write a comment.


You may also like