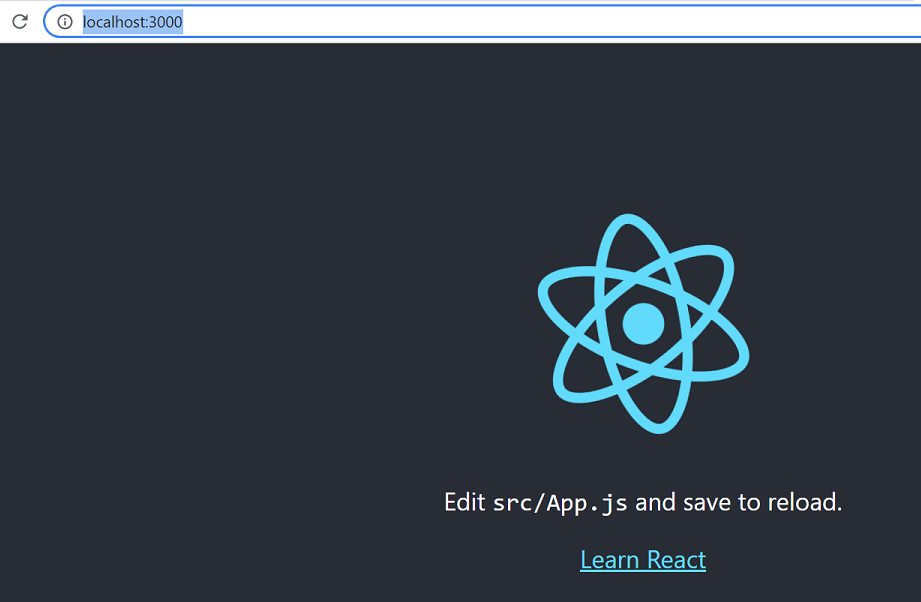
If you are starting to learn Reactjs and just created your first Hello World React app, you may be wondering what is the flow of the React app. Moreover, if you have used create-react-app to set up your project structure, you get a readymade default app and if you execute command npm start you can also view the application by going to URL- http://localhost:3000.
Again, if you are wondering how you got this display and what all happened underneath to get to this display on your browser then this article will help you in understanding the React app flow.
React project structure (create-react-app)
Assuming you have executed the following command to create a Hello World React app.
npx create-react-app helloworld-app
You will get project structure created for you under a directory helloworld-app, which’ll look something like this-

Let’s go through a brief introduction of the created folders and files.
node_modules
node_modules folder contains the external modules that your project depends upon. Once locally installed you can import these packages in your component when needed.
public
Two main files here are index.html and manifest.json. The index.html file is the template that
actually gets displayed on the browser. We’ll get to it in a minute.
Another file manifest.json provides information about the icons, theme color, background color, names to be used in the app.
manifest.json{
"short_name": "React App",
"name": "Create React App Sample",
"icons": [
{
"src": "favicon.ico",
"sizes": "64x64 32x32 24x24 16x16",
"type": "image/x-icon"
},
{
"src": "logo192.png",
"type": "image/png",
"sizes": "192x192"
},
{
"src": "logo512.png",
"type": "image/png",
"sizes": "512x512"
}
],
"start_url": ".",
"display": "standalone",
"theme_color": "#000000",
"background_color": "#ffffff"
}
src
This is the folder where you’ll write your own code for the app.
package.jsonThis file lists the packages your project depends on and which versions of a package your project can use.
React app flow
When you have an understanding of the project structure now let’s try to understand how the content is projected on the browser.
As already mentioned, index.html is the file that is actually rendered on the browser and it looks like this.
<!DOCTYPE html>
<html lang="en">
  <head>
    <meta charset="utf-8" />
    <link rel="icon" href="%PUBLIC_URL%/favicon.ico" />
    <meta name="viewport" content="width=device-width, initial-scale=1" />
    <meta name="theme-color" content="#000000" />
    <meta
      name="description"
      content="Web site created using create-react-app"
    />
    <link rel="apple-touch-icon" href="%PUBLIC_URL%/logo192.png" />
    <!--
      manifest.json provides metadata used when your web app is installed on a
      user's mobile device or desktop. See https://developers.google.com/web/fundamentals/web-app-manifest/
    -->
    <link rel="manifest" href="%PUBLIC_URL%/manifest.json" />
    <!--
      Notice the use of %PUBLIC_URL% in the tags above.
      It will be replaced with the URL of the `public` folder during the build.
      Only files inside the `public` folder can be referenced from the HTML.

      Unlike "/favicon.ico" or "favicon.ico", "%PUBLIC_URL%/favicon.ico" will
      work correctly both with client-side routing and a non-root public URL.
      Learn how to configure a non-root public URL by running `npm run build`.
    -->
    <title>React App</title>
  </head>
  <body>
    <noscript>You need to enable JavaScript to run this app.</noscript>
    <div id="root"></div>
    <!--
      This HTML file is a template.
      If you open it directly in the browser, you will see an empty page.

      You can add webfonts, meta tags, or analytics to this file.
      The build step will place the bundled scripts into the <body> tag.

      To begin the development, run `npm start` or `yarn start`.
      To create a production bundle, use `npm run build` or `yarn build`.
    -->
  </body>
</html>
So, the question is how do we reach to this file. For that you will have to look into the index.js file
which has the following line.
ReactDOM.render(<App />, document.getElementById('root'));
ReactDOM.render() method with the syntax as ReactDOM.render(element, container[, callback]) renders a React element into the DOM in the supplied container and return a reference to the component.
In the render method used in index.js, element that is rendered is <App> component and the container is the ‘root’ element. If you noticed in index.html there is a div with id as root.
<div id="root"></div>
So that’s how the <App> component is projected with in the <div> element of index.html. App.js file defines the <App> component.
App.js
import React, { Component } from 'react';
import logo from './logo.svg';
import './App.css';
class App extends Component {
  render() {
    return (
      <div className="App">
        <header className="App-header">
          <img src={logo} className="App-logo" alt="logo" />
          <p>
            Edit <code>src/App.js</code> and save to reload.
          </p>
          <a
            className="App-link"
            href="https://reactjs.org"
            target="_blank"
            rel="noopener noreferrer"
          >
            Learn React
          </a>
        </header>
      </div>
    );
  }
}
export default App;
Now again the question is how do we come to index.js file. For that you will have to understand bundling a bit.
While creating your React app you may write a number of files (js, css) which are “bundled” using tools like Webpack, Rollup or Browserify. Bundling is the process of merging all the files into a single file (bundle.js). This bundle can then be included on a webpage to load an entire app at once. This helps in optimizing the code and increases app performance.
For an example suppose you have two js files app.js and math.js.
app.js
import { add } from './math.js';

console.log(add(10, 20));
math.js
export function add(a, b) {
  return a + b;
}
Then the bundled file looks something as given below-
function add(a, b) {
  return a + b;
}

console.log(add(10, 20));
Reference- https://reactjs.org/docs/code-splitting.html
When React app is bundled using Webpack, configuration for Webpack is provided using webpack.config.js file. You can have a look at it by navigating to node_modules/react-scripts/config/webpack.config.js
There you can see the entry key and output key which specify the entry point for webpack and the location where bundle.js file will be stored.
entry: paths.appIndexJs,
    output: {
      // The build folder.
      path: paths.appBuild,
      // Add /* filename */ comments to generated require()s in the output.
      pathinfo: isEnvDevelopment,
      // There will be one main bundle, and one file per asynchronous chunk.
      // In development, it does not produce real files.
      filename: isEnvProduction
        ? 'static/js/[name].[contenthash:8].js'
        : isEnvDevelopment && 'static/js/bundle.js',
      // There are also additional JS chunk files if you use code splitting.
      chunkFilename: isEnvProduction
        ? 'static/js/[name].[contenthash:8].chunk.js'
        : isEnvDevelopment && 'static/js/[name].chunk.js',
      assetModuleFilename: 'static/media/[name].[hash][ext]',
Paths that are referred are specified in Paths.js file at the same location as webpack.config.js. One of the
entry in Paths.js is
appIndexJs: c(resolveApp, 'src/index'),
The above entry resolves to index.js and that’s how the entry point is known.
That's all for the topic React App Flow - create-react-app Structure. If something is missing or you have something to share about the topic please write a comment.
You may also like
No comments:
Post a Comment